If you’re left feeling discomfort due to an increased amount of time spent sitting, trying a new workout routine, or getting too creative with your at-home office furniture, a foam roller may bring some much-needed relief.
You don’t have to be a runner or intense workout pro to roll out your muscles when they’re feeling sore and tight. Foam rolling can be a quick and inexpensive therapy for those who sit at a desk all day, have poor posture, joint issues, or bad form while exercising. Fitness experts say the benefits of foam rolling can include:
- Relieving soreness
- Reducing inflammation and helping with muscle repair recovery
- Aiding in injury prevention by reducing muscle tension and tightness
- Increasing blood flow and elasticity of muscle tissue and joints
- Promoting relaxation and stress relief
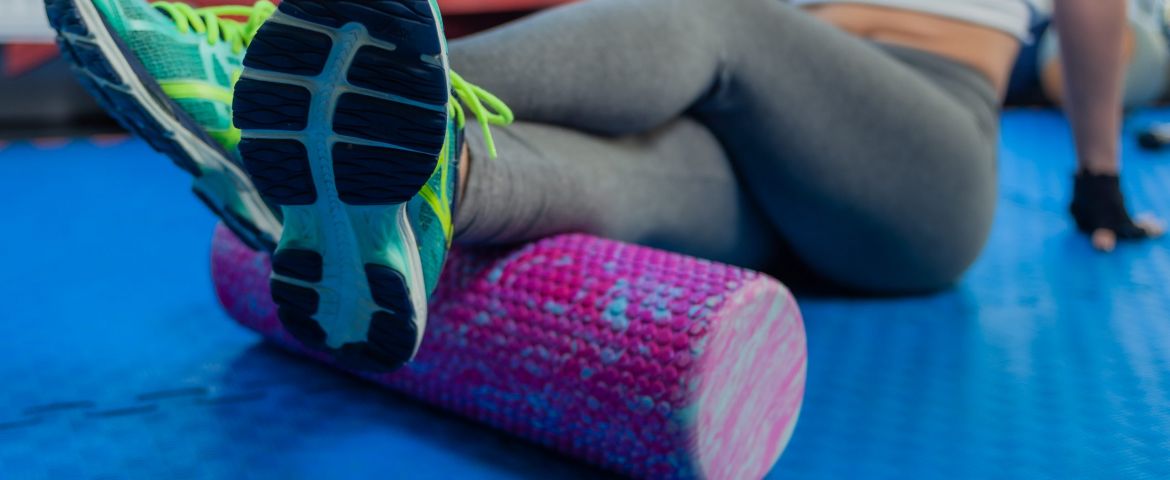
If you’re baffled by how to best use the pool noodle lookalike exercise tool, there are easy steps to follow to stretch out areas of your body that may be painful. Here are nine simple stretches you can do using a foam roller. These target some common areas of the body that tend to tighten up and get sore. And thanks to Healthline, these quick video demos show each stretch in action. Try one or all, and you’ll be feeling like you just enjoyed a massage.
1. Back rolling.
Poor posture, sitting or standing too much during the day could have your back aching by dinnertime. Try this simple rolling stretch:
- Lie with the foam roller underneath your upper back. Bend your knees with feet flat on the floor and arms either down by your sides or crossed in front of your chest.
- Tighten your core and lift yourself up into a shallow bridge position.
- Slowly roll up and down between your lower neck and mid-back, stopping at tight areas along the way.
- Repeat for 30 seconds.
2. Shoulder rolling.
On the phone all day? Lifting weights or doing yardwork, and feeling shoulder tension? Stretch out your shoulders on your side to get some relief.
- Lie on your side with the foam roller underneath your right shoulder. Rest your lower body on the ground with your left arm out in front.
- Roll slowly up and down over your deltoid muscle. Rotate your trunk slightly so you can hit part of your upper back as well if needed.
- Repeat for 30 seconds.
- Switch sides and repeat on your left shoulder.
3. Neck rolling.
Many people carry tension in their neck muscles, and the past year has brought on a lot of new stress. Too much tension in your neck can even cause headaches. Try these steps to help your neck area:
- Rest your neck on the foam roller, at the top where it connects to your head.
- Slowly turn your head to the right, holding where you feel a tightness.
- Exhale and turn your head to the left.
- Repeat for 30 seconds.
4. Lat rolling.
Lat muscles are located on your back, right below your armpits. Tightness in these muscles can impact your posture. Take these steps to loosen them up:
- Lie on your back at a 45-degree angle with the foam roller underneath your right lat. Keep your right leg straight and bend your left leg.
- Slowly start to roll from your right armpit down to your mid-back area.
- Repeat for 30 seconds.
- Switch to roll out your left lat.
5. Calf rolling.
Now let’s move on to your legs. If you’ve been on your feet all day, walking or moving more, it’s a good idea to keep your calves nice and loose with these steps:
- Sit on the floor with your legs extended and the foam roller underneath your calves.
- Lift your body up so your weight is resting on the foam roller. Cross your left leg over your right for extra pressure.
- Slowly roll your right calf back and forth on the foam roller, navigating your body forward and back with your arms.
- Complete for 30 seconds.
- Switch legs and focus on your left calf.
6. Quad rolling.
Have a desk job or just a day with a lot of sitting? Your quads could use a little stretching throughout the day with these quick moves:
- Start in a forearm plank position with the roller under your quads.
- Brace yourself with your upper body and core and slowly roll down the roller until it reaches just above your knees. Then, roll in the opposite direction until you reach your hip flexors.
- Repeat for 30 seconds.
- When you hit a tender spot, hold yourself there for a few breaths for added stretching.
7. Hamstring rolling.
These muscles in your legs can also get sore from too much sitting. Give your “hammies” some love with some rolling:
- Sit on the floor with your legs extended and position the foam roller underneath your hamstrings.
- Lift your body up so your weight is resting on the foam roller and begin to slowly roll up and down between the back of your knees and your glutes.
- Pause on tender spots and roll for at least 30 seconds overall.
- Try crossing your legs and focusing on one hamstring at a time.
8. Hip flexor rolling.
Sitting for too long can really mess with your hip flexors, as can poor form during squats and other exercises. Foam rolling can help by loosening both muscles and connective tissue in this part of your body:
- Lie down, facing the floor on the foam roller in a forearm plank position. Place the foam roller underneath your left hip flexor and bend your right leg to the side.
- Rest on your forearms and slowly roll up and down and side to side, targeting the hip flexor.
- Repeat for 30 seconds, paying close attention to extra sore spots.
- Switch and repeat on the right hip flexor.
9. IT band rolling.
Your IT band is connective tissue and it runs along your outer thigh from the hip to the knee. This is probably a stretch you’ve seen runners do, but anyone on their feet or moving a lot can benefit from rolling out soreness and tightness in this area:
- Lie on your right side with the foam roller underneath the side of your right thigh.
- Rest your bodyweight on your right forearm. Your right leg should be straight, and your left should be bent at the knee with your foot in front of your right leg.
- Brace yourself with your upper body and left leg, begin to slowly roll along the foam roller on your right IT band between your knee and glute.
- Repeat for 30 seconds, stopping at tender spots, then switch to roll your left IT band.
Additional rolling tips
Here are some other helpful tips from fitness experts if you’re a foam rolling newbie:
- Try a low-to-medium density foam roller and a yoga mat or soft, comfortable, open floor space to start.
- Try to complete stretches three times per week. You can do them anytime, but some good options are before or after workouts for stretching to warm up muscles and to prevent injury. Or, try right before bed for pain and stress-free sleep.
- Go slow and don’t forget to breathe — inhale and then exhale slowly as you roll.
- Ease into your routine — if you’re super tight and sore, foam rolling can be a bit painful at first. Each time will get easier, and then you may want to increase the density of your foam roller.
- Treat your body in sections rather than continuously rolling back and forth.
- Listen to your body: STOP whenever you feel too painful or tender.
- Once you’re more comfortable and stretched out, you can also try a stretching ball for smaller areas or a bumped, high density roller for deeper tissue relief.
Remember that a foam roller is not a cure for all major issues. You may need to combine it with other home or office stretches or scheduled massage or chiropractic care. Remember to take a fresh look at your office or school space set-up and build in more standing/sitting breaks. And as always, if you’re experiencing pain that isn’t improving with home or over-the-counter remedies, talk to your primary health care provider about your concerns and options.